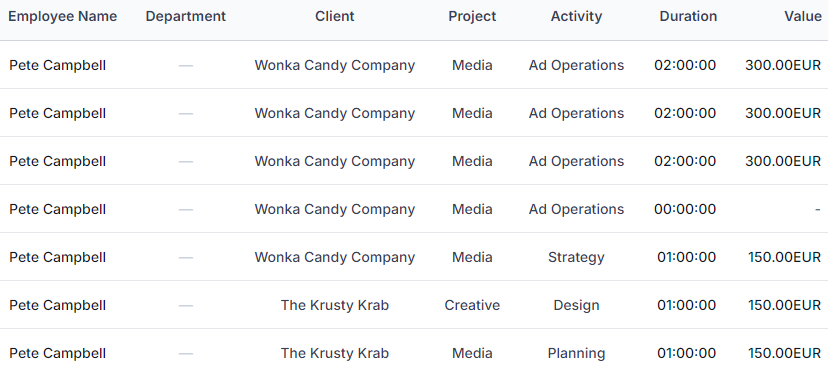
All data exports from Hypertime are in the CSV file format.
This is the case regardless of whether you use Quick Export or Dashboard interface.
1. Create a Quick Export
In the Quick Export interface, select the date range.

The Quick Export will display a preview of the data that will be extracted.
When you are happy with the data click Export.
2. Format the data in Excel
Format your data in a legible format to make your analysis easier to read.
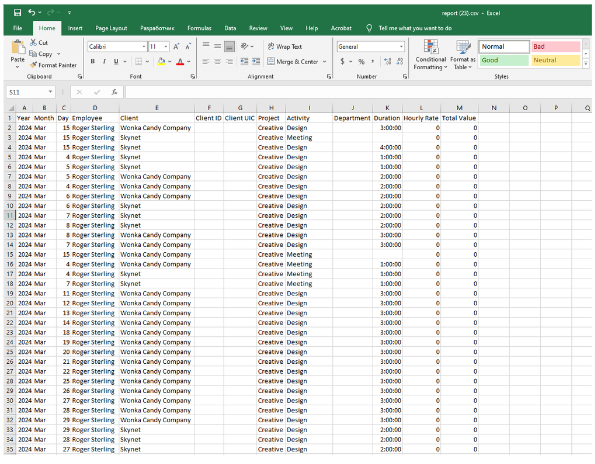
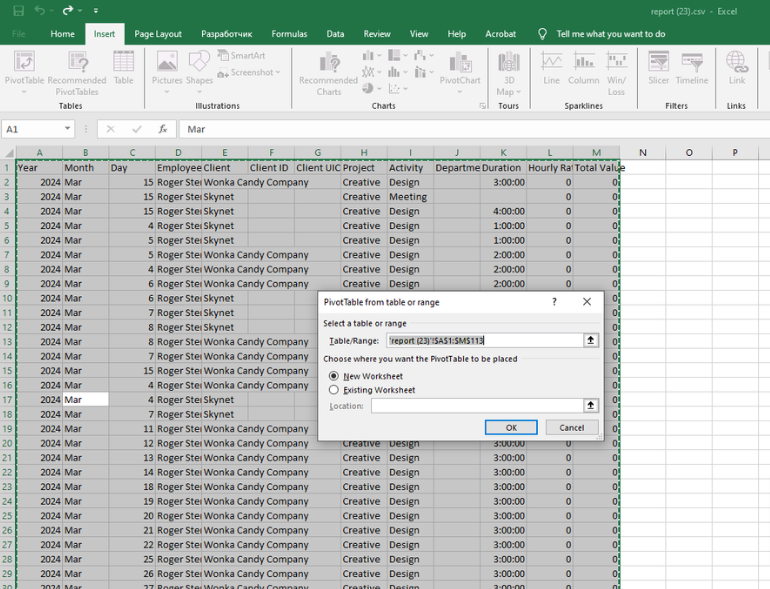
Select all data, open the Insert tab in Excel, and click on Pivot Table.
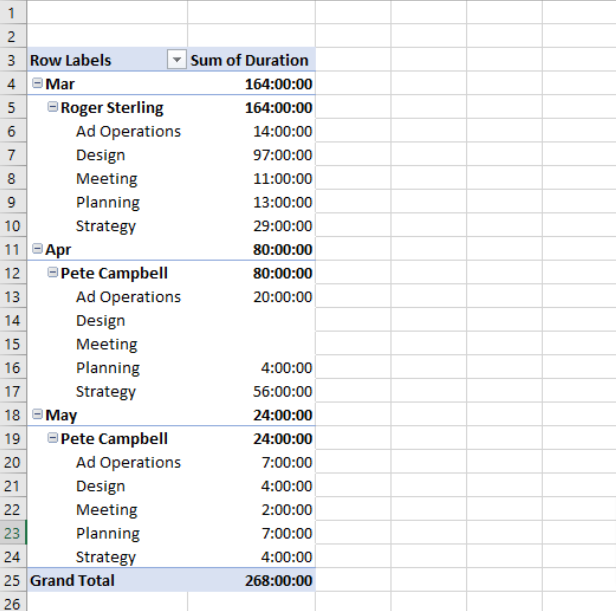
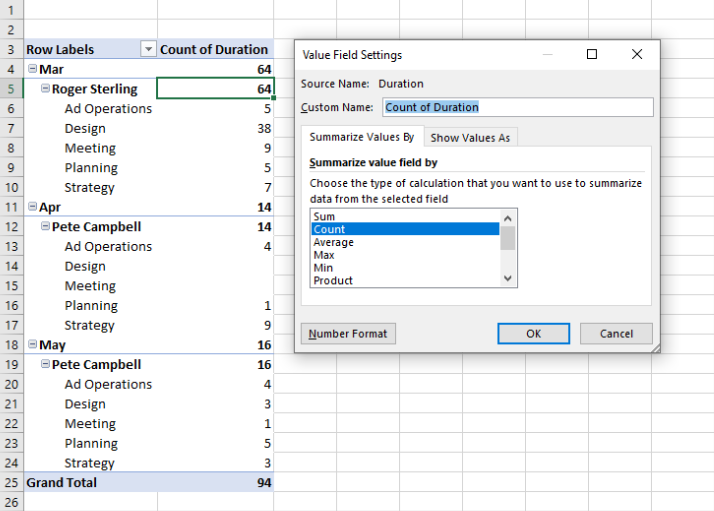
3. Change the number format of Duration
When you add Duration to your pivot table, it will be formatted as “Count”.
Change it to Sum and click Number format.
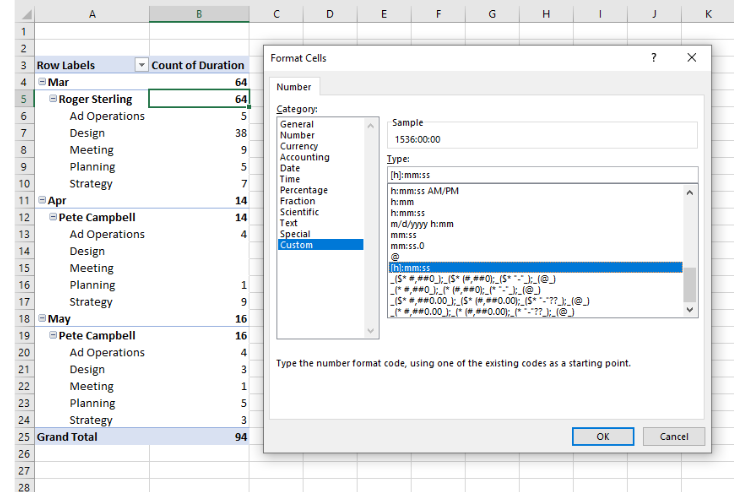
To correctly display the entries for hours, select Custom and scroll down to the bottom of the list until you see [h]:mm:ss.
The end result is that the